Had a brief and short introduction in CAD software and 3d printing, the software demonstrated was Autodesk fusion 360 and prusaslicer. The workshop was very basic and we did a walkthrough on the functions of fusion 360. Since I have used fusion 360 to design 3d parts in the past this felt like a very easy workshop but the level set is understandable as this was something new for most students in class. I have no comments on the prusaslicer or the other half of the workshop as I didn’t attend it, plus I’m using the cura slicer to export the stl-file to 3d printable g-code. Basically the slicer is just a program for converting the file of the model into a file the 3D printer can use. So there is no special benefit in using one slicer over the other, I have been using cura for a while for my printer at home, so I’m sticking with it. The task can be done with any other slicer software just have to input the correct setting in order for it give good results. There was also a brief mention of the laser cutter and this was also a repetition on previous workshop we had. Since I got the first walkthrough with the laser cutter I’ve been using it more frequently for my projects.
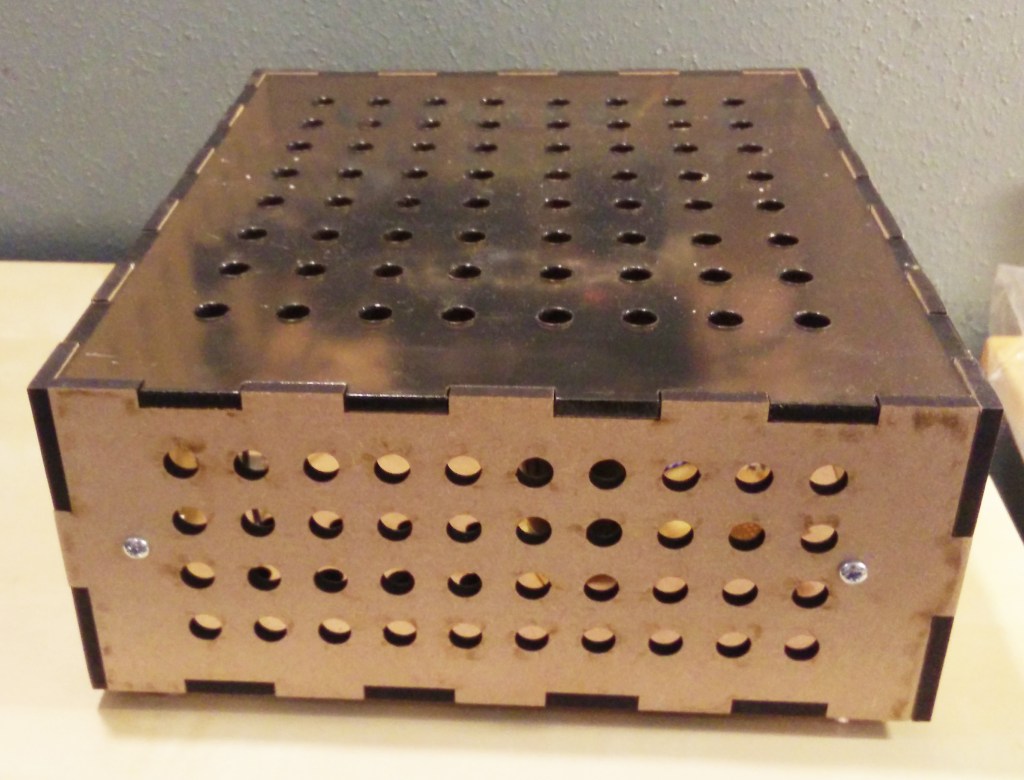
My latest project was to try out a high voltage bi-polar power supply I have designed. For that I generated a box with joints (a web based service generated the template to cut) so a minimal amount had to be spent on working on the box by hand and time and focus could be directed towards the technical aspect of the psu, testing and measuring the performance.
I have started to prioritize in developing my skills in illustrator so a the process goes faster and more fluid. Doing things by hand seems so cumbersome and inconvenient as the laser cutter is fast, precise and can cut/engrave different material. The only time investment from a prototype standpoint is on the drawing of the object itself in illustrator, the time the cutter uses is a very small percentage of the whole so it’s not really worth mentioning.
Just like my hobby projects, we can draw parallels with how the process would look in the course and in professional environment. The chain of process when I designed the psu was: drawing the circuit on paper, simulate the circuit in LTspice, build the circuit and box it and lastly test it with real world conditions. Repeat the loop if the design hasn’t achieved the desired outlined specifications.
Possibly if minor tweaks has to be done, the first/second step can be ignored and findings can be applied directly in the later stages, for example transistors seems to reach high temperature, solution is to add a bigger heat sink or a fan, which can be done directly in the build-stage.
Much similarity could be seen in the process of the prototype work in the course where we: sketch on paper, model the object in software, build/laser cut/print the model and lastly try it out. This would be one iteration of the prototype. How many times this iteration is repeated depends on if the goals of the design is reached and what kind of feedback we get from testing with users. I have not seen a good design being developed from one iteration and so it will be interesting to see how many iteration our prototype will go through in the project 2.
If i recall correctly most of my hobby prototypes sees 3 iterations before I’m completely satisfied with the end result. It seems that the right way to do it is to nail down the specifications from the start and not deviate from the specifications until testing has been done. First iteration will produce a prototype with high functionality but low visual physical appearance. It simply isn’t useful to spend time on the visuals if the objective of the prototype is to produce a function and vice versa if the main objective of the prototype is to communicate through the visual appearance.
Second iteration produces a refined functionality which was not achieved during first iteration or simply tweaks for the better outcome as well as high level of visual appearance. The third iteration is tweaking the functionality to final and definite values with some improvements on the visual appearance if needed.
